Interactive Christmas Displays
If you're like me, you love Christmas and all the bells and whistles that come along with it (sorry to all you Scrooges out there!), I unpack my Christmas Decor as soon as Thanksgiving is over and sometimes it's close to February before it all comes down! As much as I love Christmas, one thing frustrates me year after year...all those cherished decorations have the same low quality sounds, and the displays always play the same song! This year I wanted to change things up with a Christmas Display that could become a tradition in my house but would have nice quality sounds that I could change when I needed to hear something new...enter the Dream Player LITE!
The Dream Player LITE can play up to 32 tracks in Random Mode. Meaning I could have up to 32 of my favorite Christmas songs in my display. With random mode the songs would be a surprise, you never know what you are going to hear, but you know it will be something you like. Best of all, if I get tired of any of the songs in my display I can replace them with new songs at any time! It's completely customizable and the 44.1KHz, 16 Bit, Stereo, WAV file formatting the player needs means I get high quality sound files that aren't painful to listen to.
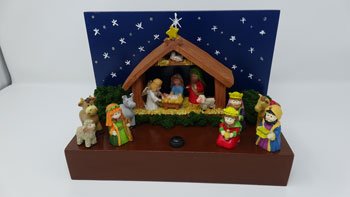
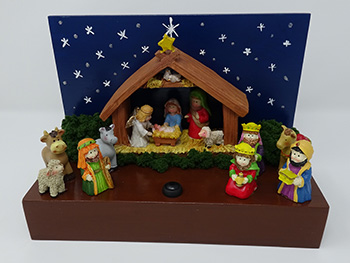
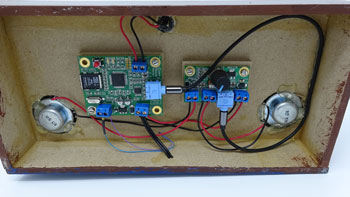
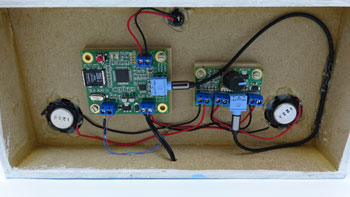
I ended up making two different displays. The first one is a Nativity Display. It features a Dream Player LITE for Audio File Playback, Non-powered speakers, a push button, a Milli-Amp to control and power the speakers, and an LED hidden in the rafters of the stable. I cut and glued thin MDF together to create a base that measures 5" Long, 10" Wide and 2" High, the backdrop then extends 5" higher than the base. I painted the base a nice shade of brown and the backdrop Navy Blue for the night sky. Then finished everything with two coats of clear spray laquer for a nice glossy finish. Next I drilled holes for my push button and two non-powered speakers before mounting them. Underneath the base I glued in some scrap wood chunks that I had cut to the Dream Player LITE and Milli-Amp's dimensions. This way I could screw them into the base without having to worry about the screws coming up through the base. I drilled a hole through the back of the display for the Power Supply to fish through and then wired up the push button and the non-powered speakers. I'm using the Mill-Amp to power the non-powered speakers and for volume control. I also drilled a tiny 1/32" hole into the center of the base for the LED wires coming from the rafters of the stable.
Once all the hardware was mounted, I switched over to the stable for a few minutes. Glued the LED up into the rafters and then secured the wires to the back of it so you can't see them in the finished display, then fished the wires through the center hole, glued the stable in place (hot glue was definitely a big help in this project!) and wired up the LED to the Control Output on the Dream Player LITE. Tested everything to make sure it was working and then glued down the remainder of the Nativity figurines. For finishing touches I painted some stars onto the backdrop and covered the non-powered speakers with some Clump Hobby Foliage. Now that the display itself was done it was time to go to work on the Audio Files. Originally I just wanted to play some favorite Christmas songs but then I decided to go for a more creative route. One of my good friends came over to help me, and we made some recordings of scripture readings with an instrumental background. I loaded these files onto the Dream Player LITE's SD Card and pushed the play button. When triggered the display plays one of my four audio recordings and lights up the LED in the top of the stable. The audio resonates nicely in the base and the LED is a great touch.
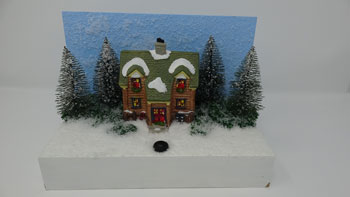
The Second Display features a snowy home scene. I made the same base for this display as I did for the Nativity Display. The only difference is that I painted the backdrop a shade of light blue and the base white. I then sprinkled some fake snow onto the backdrop and sprayed a clear layer over it to get it to stick. Making it look like it is snowing. I used the same hardware set up as the first display, again covering the non-powered speakers with clump hobby foliage. Only this time I coated everything in fake snow and then sprayed it with a dilluted Modge Podge solution to get everything to stick. Added on a ceramic house that I purchased for $1.53 at the store and a few pine trees that cost $3.20 for four of them. I also stuck an LED in the house so it lights up when the audio plays. Only downside with the cheap ceramic house is the window holes are not very big so it doesn't let much light out.
This Christmas House Display is loaded with 16 of my favorite Christmas songs. Using the Dream Player LITE's Random Mode, it plays a track with each button press. If you don't want to hear a certain song simply push the button again and the file will fade out and then play the next song. The player goes through the entire list of 16 songs before re-shuffling them and playing them again in a different order. You never know what is going to play next!
This project was a lot of fun and it turned out better than I imagined! Give it a try! Create your own display and add in a Dream Player LITE (or a more advanced player) to make your Christmas Season Merry and Musical!